My Art

In July 2022, I bought three of the Tim Holtz die sets from the Chapter 3 Sizzix release. They are what Tim calls ‘foundational dies’ and what I call ‘oh my god, I need those!’

Three sets of Tim Holtz dies.
The three sets of dies.

I’m always especially keen on dies that I can use for book-making or journal inserts because I’m rubbish at accurately measuring and cutting, so as soon as I saw these, I knew I’d be making books with them.

Although I’ve used all the dies, I've developed an obsessive love affair with the slide mount die from the Specimen set and I’ve been making a series of unique artist books using it. I challenged myself to make each book with a different theme and binding. I’ve made 14 so far… things may have gotten a little out of hand! But hey, as long as I still have ideas for them, then I’m going to keep making them.

Book 1: Sabotage

The first book in the series.

A small brown and green textured book.
The front page of Sabotage.

The pages were made from brown card sprayed and splattered with Seth Apter izink ink in Underwater, Tea and Goldmine, Lindy’s spray in Tibetan Poppy Teal, Dina Wakley gloss spray in Night, and Distress spray in Walnut Stain. I added texture with Distress Crypt grit paste, Distress Texture Paste through a Tim Holtz stencil and Distress Foundry Wax in Mined.

One of the inner pages of a small brown and green book.
One of the inner pages of Sabotage.

The centres are vintage digital photos from Pink Monarch Prints on Etsy. They were inkjet printed on copy paper and altered with water and wax, then cut with another die from the Specimen set before being slightly torn.

The text was typed with a vintage typewriter onto sepia toned inkjet printed paper and more water and wax. The text reads, ‘everything seemed so much harder than before’. It’s about how I was feeling about the pandemic at the time.

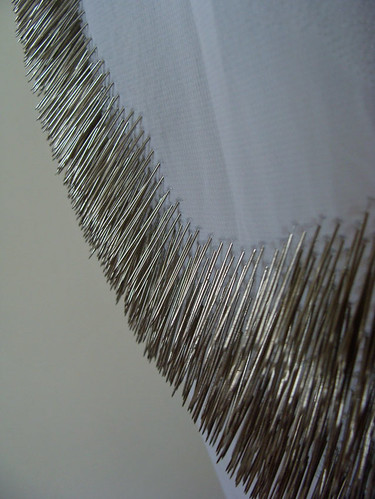
I made an extra hole along the centre of one edge and then the pages were bound with a ring binding made from copper wire coated with Distress Crypt grit paste and Distress Foundry Wax

The side view of the book.
The side view of Sabotage showing the wire binding.

You can see all the pages here.

Book 2: Cascade

Cascade was a direct response to Sabotage, although they look quite different. When I made that first book, I swithered over which way round to use the images. Because they’re printed on thin copy paper, the paper becomes translucent when you wax it so the images can be seen from both sides. I used the images in Sabotage the right way round, so I wanted to make a second book using similar images that were reversed.

The front cover of a small brown and gold book.
The front cover of Cascade.

The pages were made from brown card coloured with Seth Apter izink inks in Underwater, Tea and Morning Mist plus some Uncharted Mariner Distress ink and Distress Oxide sprays in Faded Jeans and Salty Ocean. I deliberately used the reverse of the card because I wanted to explore the way the ink seeped through the paper. I’d noticed the effect in my previous book and been very taken with it. The frames were lightly stamped with Vintage Photo archival ink and a Tim Holtz stamp before the centres were added.

The first page of Cascade.

The images were from Pink Monarch Prints on Etsy. They were printed on copy paper with my inkjet printer, splattered with water and then waxed. I used the reverse of the images because again, I wanted that more faded, ghostly look. However, I also tore them a lot so that the lovely blue from the Oxide inks was visible.

The text reads “we fell prey to ghosts and old magic. It was typed on a vintage typewriter loaded with brown ink, I used tissue paper for the pages and copy paper for the title. The text was all glued on and then circled with brown Pitt pen to make the words feel more grounded and intentional.

The cover and the binding tabs were made from a thicker Kraft cardstock for strength. I stippled them all with Gilded Distress Foundry Wax and then filled in any gaps with Walnut Stain Distress ink for a mottled, aged look.

One of the pages of Cascade showing the binding tabs.

The cover has two layers, an outer cover and a matching inner layer that the binding tabs were sewn into. After the tabs were bound in using a concealed three hole pamphlet stitch, I glued the slides in between the two sides of the tabs and then the inner and outer covers were glued together to completely hide the sewing. Finally the cover was finished with two eyelets and a brown ribbon to close the book.

There's a short video of the binding process here and more images here and here.

Oh, and it's called Cascade because of the way the pages move.

Book 3: Silent

This one is about my fears around insect decline and climate change - if the pollinators go, so do we. It’s called Silent in a nod to the seminal 1970’s book Silent Spring by Rachel Carson and I’ve added the text, ‘Anthropocene No 1’ on the back because I suspect I may need to make more works about climate change. It bloody terrifies me and I tend to deal with my fears by making work about them. My art is not therapy but it is often a way to have a dialogue with my inner self.

A brown fabric cover of a small handmade book.
The cover of Silent.

I knew I needed more strength for this book construction, so the pages were cut from thicker brown card. Instead of cutting the whole die, I only cut the fronts so that once two of them were glued together I would have a fully transparent slide. I added areas of Distress ink, Crackle Accents and Distress crayon to the slide mounts. Each slide has two pieces of sanded, heat-resistant acetate in them. I stamped the insects, words and numbers (all from a Tim Holtz set) with black Stazon ink, which works on non-porous surfaces like acetate. Both pieces of acetate are reversed so that the stamping is on the inside, partly to protect the stamping but mostly because I preferred the slightly more subtle look it gave. After I’d glued the slides together, I carefully burnt the edges, slightly melting the acetate as I did. I had an idea in my head of museums burning and this being the last damaged evidence of these insects remaining. Hey, no one said this was a cheerful book!

A set of slides filled with stamped acetate.
The pages before they were bound.

This one was bound by putting jump rings through the slide holes, glueing them shut and then sewing them to a fabric spine. I coloured the fabric cover and the spine with watered down brown acrylic paint. I glued the spine into the cover, then glued on the title, the text and the wool closure plait. The typed text on the front inner cover reads: “And after that, there was no going back.”

The inner cover of the book.
Two of the inner pages of the book.

More images here.

So that's the first three books from this series, I'll add more soon.

During my blogging hiatus, one of the many things I’ve been making is a stitched series using WW2 cream Utility blankets.

A cream blanket with hemmed holes hanging from a white pole
Fettle hanging in my studio, Dec 2022

The first piece is called Fettle. I’ve been cutting multiple holes in a blanket and hemming them with mattresses stitch. The second piece is called Fallow and it comprises of round pebbles sewn onto a blanket with (the unfortunately named) Colonial Knots. I see them both as a continuation of the ideas raised in Tatterdemalion.

A cream blanket with holes and stones.
Fettle before I cut the stones off.

Fettle was started in 2018 and is nearly finished. It would have been done already but I made a major mistake in the concept of the piece and spent an embarrassing amount of time sewing stones into the middle before realising that I was actually trying to squeeze two different pieces into one. Unfortunately I was nearly finished before I realised that I needed to cut the stones off Fettle and start a second companion piece with them.

A cream blanket with lots of cut stitches
Cutting the stones off Fettle

What's worse is that I was recently looking through my old sketchbook and found a drawing where I'd originally conceived of it as two pieces not one. I don't know when or why I foolishly squashed them together, my suspicion is that I just misremembered the original plan. Guess it just goes to show the importance of flipping through your sketchbooks on the regular!

Sketchbook page with two rough pen drawings and notes.
Sketchbook drawing of what are now Fettle and Fallow

So that was an annoying but very necessary realisation. I’m much happier making two separate but connected pieces. Before there was a constant feeling of wrongness (that I should have heeded much earlier), whereas now there's a deep feeling of rightness. I’ve only just started sewing the stones onto Fallow because it took me 7 months to source a second blanket the same size as Fettle. So it’ll be a while before that’s finished and they can be shown together as I envisage them, with Fettle hanging on a wall and Fallow tumbled on the floor under it.

A stone sewn into a cream blanket.
Starting the sewing on Fallow

What’s odd is that during those 7 months while I was trying to find a second blanket, Fettle temporarily lost its name. After I took the stones off, I was unsure whether it was still called Fettle or not but the minute I bought the new blanket and understood that it was called Fallow, Fettle reclaimed its name. Apparently they are so deeply connected that I couldn’t properly name one until I knew what the other one was called.

A cream blanket with cut holes hemmed in blanket stitch. A needle with cream wool is in the foreground.
Sewing holes in Fettle

----------------------

I chose to work with Utility blankets for several reasons and none of them are anything to do with WW2 nostalgia.

Firstly, I got obsessed with a scratchy old grey wool blanket at my parents house. It gives me Big Art Feels; I am simultaneously drawn to its humble beauty but repelled by its scratchiness. I call this The Push-Pull Feeling and it’s the basis of a surprising amount of my work.

My parents are still using that blanket as a mattress topper so I don’t want to ask them for it. Besides, there’s only one of it, which would make it far too precious for me to ever use for art. I don’t know how many blanket pieces I’ll ultimately make but I know myself and I like to work in series. I knew my chances of finding a set of identical blankets to the one my parents own was ridiculously small, so I needed a reliable source of substitute blankets that gave me that same Push-Pull feeling.

Modern blankets are way too soft, plus I wanted to work with old blankets that had already lived a life. However, I didn’t want to destroy anything truly precious or expensive. I settled on Utility blankets because they were made in their thousands to a set standard, come up fairly regularly on EBay and even now can be bought reasonably cheaply. And naively, I initially thought that choosing Utility blankets would mean they’d all be identical.

Hah, I soon learned otherwise!

I now own four of these blankets in two sizes and each is slightly different. Although like all Utility products they were standardised due to the restrictions of World War 2, it’s obvious there was a certain amount of wiggle room in the rules. Even if they had started out identical, which they didn’t, they have been living in different conditions over the last 70 years. Some have clearly been used and washed far more often than others, some have stains, holes or other damage and they are all subtly different shades of cream.

So Fallow is not an exact colour and texture match to Fettle but by this point in my blanket collecting, I wasn’t expecting it to be. Fallow has a distinct Herringbone pattern that Fettle lacks and it’s slightly darker. They are very similar but not identical; siblings not twins. However, they are the same size and that was the key thing for me.

Two cream blankets
Fettle on the left, Fallow on the right

Don’t expect to see Fallow finished anytime soon, this is the very definition of slow art. Even if I worked on it every day, which I know I won’t, it would still take ages. I'm trying to crack on with it now while I'm still fresh and enthusiastic because I know from bitter experience that it's likely to get harder later. Baring disasters, Fettle should definitely be finished in 2023 and I am working on them both weekly. I find if I don’t strongly commit to working on the big sculptural textile pieces every week, they fall off my list too easily.

The Death Of Roses brings gifts, welcome and unwelcome.

The Death Of Roses is born
Photo by Kirsty Hall, Oct 2016

The Death Of Roses was an accident. In October 2016, I needed a last minute Halloween costume because I'd misplaced the make-up I needed to do a broken doll's face. With only a few hours to come up with a new idea, I looked at the lace and rose gothic dress I'd planned to wear, remembered a skull and rose head-dress I'd recently been given and the phrase 'the death of roses' popped unbidden into my mind.

'But what does The Death Of Roses do?' I immediately asked myself.

I knew that the phrase 'The Death Of Roses' would be meaningless to people: to give her a bit more heft, she needed some kind of shtick so I decided that she would hand out rose mottos. In a flurry of activity, I hit the internet to collect a selection of phrases, poems and lyrics that mentioned roses and then printed, cut and folded them into little 'rose fortunes'.

A printed out rose quote lying on red fabric rose handbag
A rose motto on my red rose handbag
Photo by Kirsty Hall, Oct 2016

In retrospect, it's no accident that my instinct was to give out rose mottos - my recent art has been very focused on the concept of the gift and I've become increasingly fascinated with the interactions, obligations and cultural meanings involved when you give something away, especially in the context of art.

Dramatic red and black make-up with thorns and black roses drawn on in permanent marker (not too permanent on skin, thankfully!), a lace rose choker and a handbag made of red fabric roses finished my transformation into The Death Of Roses.

Death Of Roses make-up in progress
Photo by Kirsty Hall, Oct 2016

I circulated at the event, walking up to people and saying,  'good evening, I am The Death Of Roses, would you like a rose motto today?'

The complete Death Of Roses look
Photo by Kirsty Hall, Oct 2016

As soon as I started handing out the rose mottoes, I realised that I'd created something far more compelling than a simple Halloween outfit and that it was an art performance piece.

The interactions with people were fascinating; some people were suspicious, some assumed that I wanted to be paid but usually people instantly 'got it' and most absolutely loved it. I would hand an entirely random rose motto to a person, only for them to read it and be staggered by how beautiful it was or how resonant it was for their life. It was a powerful experience for both me and the people I interacted with.

It was immediately apparent to me that I could take the idea much further. The Death Of Roses  'wanted to be real', so I started thinking about other events she could attend and whether I could create a mythic figure by 'seeding the culture' with the idea of her. I've been very immersed in David Southwell's Hookland of late and his work on that 'real folklore from a fake county' has inspired a lot of my thinking around The Death Of Roses. There's a good interview with David here or you can follow Hookland on Twitter for a bit of daily weirdness.

So who exactly is The Death Of Roses and what does she mean?

Truthfully, I'm not entirely sure yet because she's still developing. Obviously given her name, she's an avatar of death, but as with the Death card in Tarot, I feel she is more about transformation and change than literal death. I think of her as bringer of truths but sometimes not gentle ones - roses have thorns, after all.

2 Comments

During the summer my occasional art assistant, The Wonderful Z, helped me get my studio up and running.

I'd already carved out a studio area in my bedroom but because it hadn't been organised properly, it had devolved into a dumping ground. So we decluttered, moved furniture around and made sure that I had everything I needed within easy reach. Although I'm still very unwell, it's made a huge difference and my productivity has markedly increased.

Before:

Studio before
Studio before: Kirsty Hall, July 2013

After:

Studio after
Studio after: Kirsty Hall, July 2013

The Wonderful Z also installed a pole and hung Pelt, a pin piece that I started work on way back in 2007. It's been in storage for two years due to the house sale and move, so it was lovely to see it again.

Here's how it looked when we unwrapped it...

Pelt in progress 01
Pelt in progress: Kirsty Hall, July 2013

And here it is now...

Pelt in progress 04
Pelt in progress: Kirsty Hall, August 2013

Despite my poor health, I've been working on it slowly but steadily, mostly whilst listening to the excellent Talking Walking podcast. It may not look like much progress, but I'm happy with how it's coming along.

I'm going to cover ALL the fabric with pins. I did consider leaving some areas blank because I'm enjoying its present map-like quality but I started the piece with the intention of entirely covering it and I've decided to stick with that idea. Besides, I can always make another one if I decide I want a map related piece.

Pelt in progress 02
Pelt close up: Kirsty Hall, August 2013

Ideally I'd like to get it finished this year but that's probably unrealistic because I can only do between 20 minutes and an hour before I get too tired and sore to continue. An hour's work is a couple of square inches so there's a lot of hours to go. The trick with a time-intensive piece like this is to concentrate on what you've done and not worry about all the work still to come. I just take it one pin at a time.

Pelt in progress 03
Pelt close up: Kirsty Hall, August 2013

Right, that's enough blethering from me, I'm off to do some more pinning!